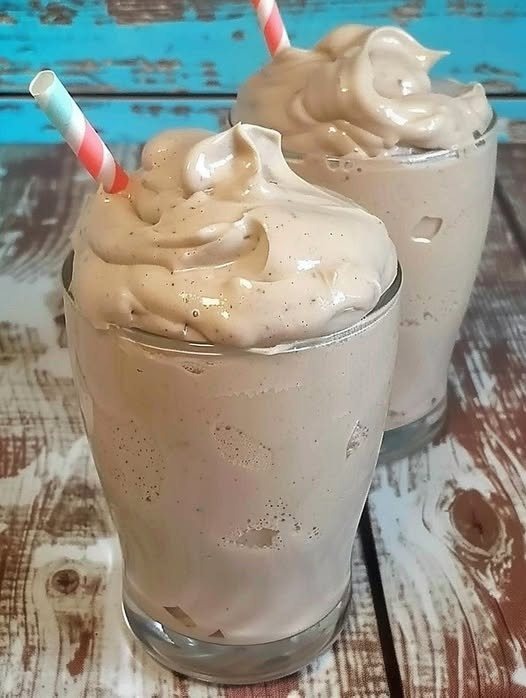
Nothing beats the rich, creamy, and refreshing taste of a homemade chocolate milkshake. Whether you’re looking for a cool summer treat, a delicious dessert drink, or a quick way to satisfy your chocolate cravings, this Creamy Homemade Chocolate Milkshake Recipe is guaranteed to become one of your favorites.
Made with simple ingredients like milk, chocolate ice cream, cocoa powder, and chocolate syrup, this milkshake delivers a luxurious texture and deep chocolate flavor in every sip. Topped with fluffy whipped cream and a drizzle of chocolate syrup, it looks just as beautiful as the milkshakes served in cafés and restaurants.
The best part is that this recipe takes only a few minutes to prepare and requires no special skills. With a blender and a handful of ingredients, you can create a thick, smooth, and irresistible milkshake right in your own kitchen.
Why You’ll Love This Chocolate Milkshake
There are countless reasons to love this homemade chocolate milkshake recipe.
First, it is incredibly creamy and smooth. The combination of chilled milk and chocolate ice cream creates a rich texture that feels indulgent without being complicated to make.
Second, it is quick and easy. You can prepare this delicious drink in less than ten minutes, making it perfect for busy afternoons or last-minute dessert cravings.
Another reason this recipe stands out is its versatility. You can customize the ingredients, sweetness level, and toppings according to your personal preference. Whether you like extra chocolate, coffee flavors, caramel drizzles, or cookie mix-ins, this recipe provides the perfect base.
Most importantly, homemade milkshakes taste fresher and more flavorful than many store-bought versions because you control the quality of every ingredient.
Ingredients
For the Milkshake
- 2 cups chilled milk
- 3 scoops chocolate ice cream
- 2 tablespoons cocoa powder
- 2 tablespoons chocolate syrup
- 2 tablespoons sugar (optional)
- 1 teaspoon vanilla extract
- 1 cup ice cubes
For the Topping
- Whipped cream
- Chocolate syrup
- Chocolate shavings
- Cocoa powder for garnish
Equipment Needed
- Blender
- Measuring cups and spoons
- Chilled serving glasses
- Straws for serving
Step-by-Step Instructions
Step 1: Chill the Serving Glasses
Place your serving glasses in the refrigerator or freezer for about 10 minutes before making the milkshake.
This simple step helps keep the milkshake colder for longer and creates that authentic café-style experience. Cold glasses also help maintain the thick consistency of the drink.
Step 2: Add Ingredients to the Blender
Into a blender, add the chilled milk, chocolate ice cream, cocoa powder, chocolate syrup, vanilla extract, and ice cubes.
Make sure the milk is cold and the ice cream is frozen for the best texture. Using cold ingredients is one of the secrets to achieving a thick and creamy milkshake.
Step 3: Blend Until Smooth
Blend everything together for 30 to 60 seconds or until the mixture becomes smooth, creamy, and frothy.
The milkshake should have a rich consistency that pours easily but remains thick enough to hold its creamy texture.
If the shake seems too thick, add a small splash of milk. If it is too thin, add an extra scoop of ice cream and blend again.
Step 4: Taste and Adjust
Taste the milkshake before serving.
Depending on the sweetness of your ice cream, you may or may not need additional sugar. If you prefer a sweeter drink, add sugar and blend for a few more seconds.
This step allows you to customize the flavor exactly to your liking.
Step 5: Prepare the Glasses
For an attractive presentation, drizzle chocolate syrup around the inside walls of the chilled glasses.
This creates beautiful chocolate streaks and adds extra flavor to every sip.
Carefully pour the milkshake into the prepared glasses.
Step 6: Add the Toppings
Top each glass generously with whipped cream.
Create a soft swirl on top and finish with a drizzle of chocolate syrup. Sprinkle chocolate shavings or a light dusting of cocoa powder for an elegant finishing touch.
These toppings not only improve the appearance but also enhance the overall flavor experience.
Step 7: Serve Immediately
Insert colorful straws and serve right away.
Freshly blended milkshakes always taste best when enjoyed immediately while they are cold, thick, and frothy.
Tips for the Perfect Chocolate Milkshake
Use High-Quality Ingredients
The quality of your cocoa powder, chocolate syrup, and ice cream significantly affects the final taste. Premium ingredients create a richer and more satisfying milkshake.
Keep Everything Cold
Cold ingredients are essential for achieving a thick consistency. Warm milk or partially melted ice cream can result in a thinner shake.
Don’t Overblend
Blend just until smooth. Overblending can melt the ice cream too much and make the milkshake less creamy.
Adjust the Thickness
For a thicker milkshake, use more ice cream and less milk.
For a lighter consistency, simply add a little more milk and blend again.
Chill the Glasses
This simple step helps maintain the ideal texture and keeps the milkshake refreshingly cold for longer.
Delicious Flavor Variations
Oreo Chocolate Milkshake
Add 5 to 6 crushed chocolate sandwich cookies before blending. This creates a rich cookies-and-cream flavor with delicious texture.
Peanut Butter Chocolate Milkshake
Blend in 2 tablespoons of peanut butter for a creamy, nutty twist that pairs beautifully with chocolate.
Mocha Chocolate Milkshake
Add a shot of espresso or one teaspoon of instant coffee powder for a coffeehouse-style mocha milkshake.
Banana Chocolate Milkshake
Blend in one ripe banana for natural sweetness and extra creaminess.
Salted Caramel Chocolate Milkshake
Add caramel sauce and a tiny pinch of sea salt for a gourmet dessert-style drink.
Serving Suggestions
This chocolate milkshake pairs wonderfully with many desserts and snacks, including:
- Chocolate chip cookies
- Brownies
- Waffles
- Pancakes
- Doughnuts
- Chocolate cake
- French fries
- Ice cream sundaes
It is perfect for birthday parties, family gatherings, summer barbecues, movie nights, and special celebrations.
Why Homemade Milkshakes Are Better
Homemade milkshakes offer several advantages over store-bought alternatives.
You have complete control over the ingredients, sweetness level, and flavor combinations. There are no unnecessary preservatives or artificial additives, and you can use fresh, high-quality ingredients for the best taste.
Making milkshakes at home is also more economical and allows you to experiment with endless flavor possibilities. Every glass can be customized exactly how you like it.
Storage Instructions
Chocolate milkshakes are best enjoyed immediately after preparation.
However, if you have leftovers, store them in the refrigerator for up to a few hours. Before serving again, blend briefly to restore the creamy texture.
Keep in mind that the milkshake may lose some thickness over time, so fresh preparation is always recommended.
Nutritional Benefits
While this milkshake is definitely a sweet treat, it also provides some nutritional value.
Milk contributes calcium and protein, which support healthy bones and muscles. Dairy ingredients also provide energy and essential nutrients.
Enjoyed in moderation, this homemade chocolate milkshake can be a fun and satisfying part of a balanced lifestyle.
Frequently Asked Questions
Can I make this milkshake without ice cream?
Yes. Replace the ice cream with frozen milk cubes or frozen bananas for a different but still creamy texture.
Can I use dairy-free milk?
Absolutely. Almond milk, oat milk, soy milk, or coconut milk work well in this recipe.
How can I make it thicker?
Add more ice cream or reduce the amount of milk.
Can I prepare it ahead of time?
Milkshakes are best served fresh, but they can be refrigerated for a short period and blended again before serving.
Final Thoughts
This Creamy Homemade Chocolate Milkshake is the ultimate chocolate lover’s dream. Rich, smooth, and incredibly refreshing, it delivers café-quality flavor using simple ingredients you probably already have at home.
From its silky texture and deep chocolate taste to its fluffy whipped cream topping, every sip feels indulgent and satisfying. Whether you’re making it for children, guests, family gatherings, or simply treating yourself after a long day, this recipe never disappoints.
Easy to prepare, endlessly customizable, and absolutely delicious, this homemade chocolate milkshake deserves a permanent place in your dessert collection. Grab your blender, chill your glasses, and enjoy a thick, creamy, and unforgettable chocolate milkshake whenever the craving strikes.

Leave a Reply