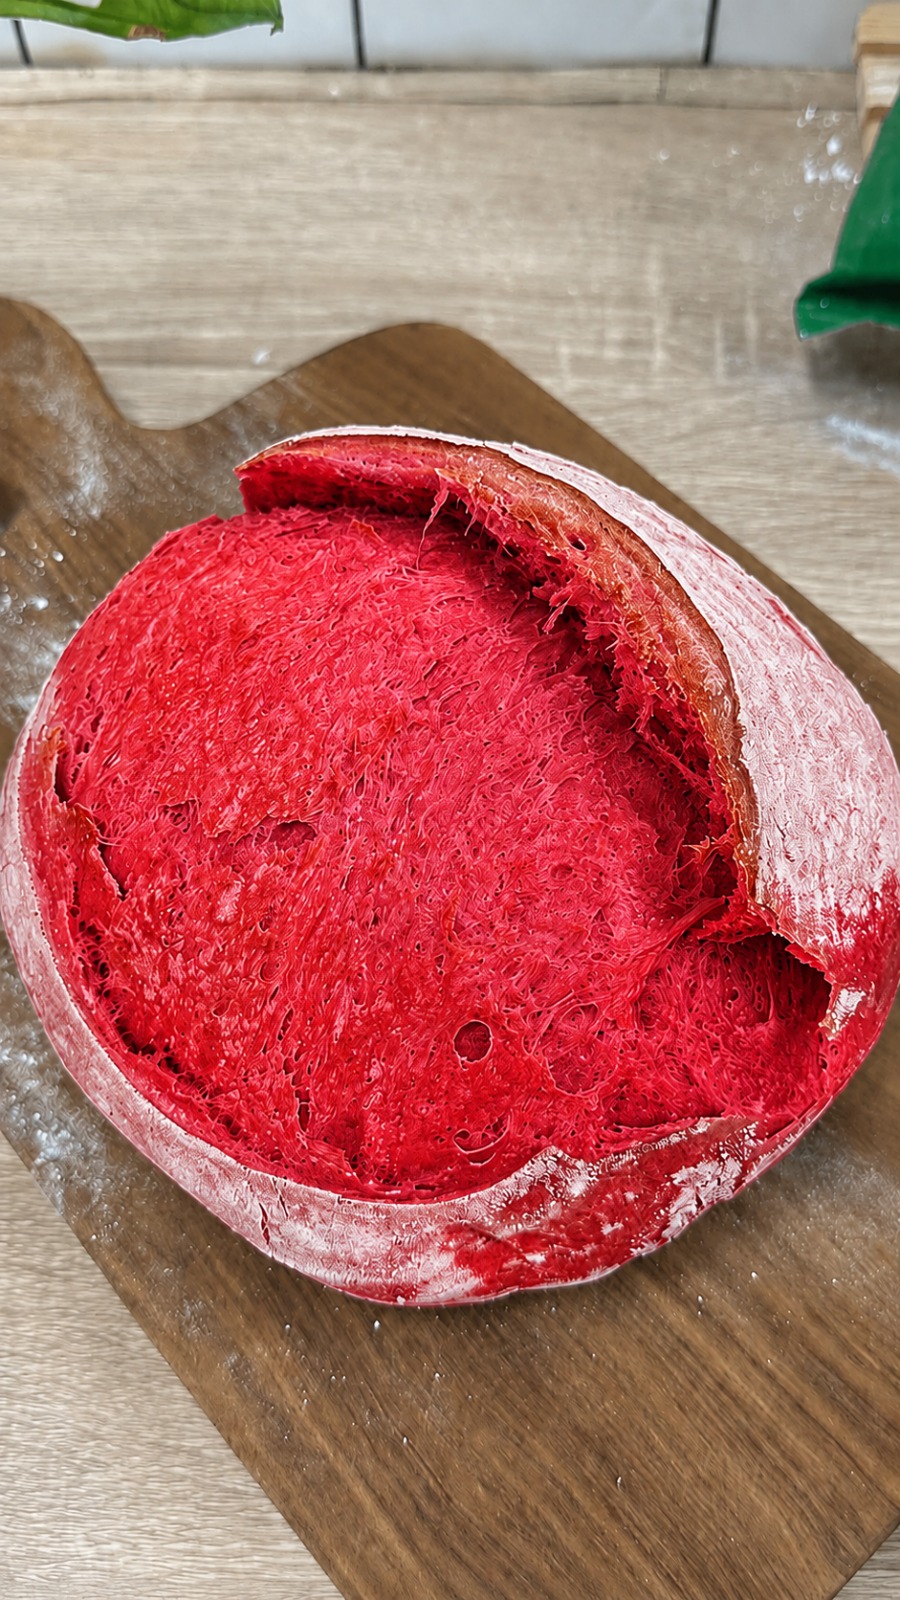
There’s something truly magical about baking artisan sourdough bread at home. The crackling crust, the airy interior, and the rich flavor created through natural fermentation make every loaf feel special. But if you’re looking to take your sourdough baking to the next level, this Ruby Red Artisan Sourdough Bread is the perfect recipe to try.
With its stunning ruby-red color, rustic artisan appearance, and classic sourdough flavor, this bread is guaranteed to become a conversation starter. Whether you’re preparing a loaf for a holiday gathering, creating eye-catching food photography, or simply experimenting with creative baking ideas, this vibrant sourdough bread delivers impressive results.
The striking red color can be achieved naturally with beetroot powder or by using high-quality red food coloring. Despite its unique appearance, the bread still maintains the delicious taste and texture that sourdough lovers enjoy. The result is a loaf that looks extraordinary while offering the same chewy crumb and crisp crust found in traditional artisan sourdough.
Why You’ll Love This Ruby Red Sourdough Bread
This bread is much more than a beautiful loaf. It combines visual appeal with exceptional flavor and texture.
Some reasons you’ll love making this recipe include:
- Beautiful ruby-red color that stands out on any table
- Crispy artisan-style crust with a rustic appearance
- Soft, airy crumb with excellent texture
- Perfect for sandwiches, toast, and charcuterie boards
- Great for holidays, parties, and special occasions
- Naturally fermented for enhanced flavor
- Easy to customize using natural or artificial coloring
Whether you’re a beginner or an experienced baker, this recipe is both fun and rewarding.
Ingredients
For the Dough
- 500g bread flour
- 350g warm water
- 100g active sourdough starter
- 10g salt
- 2 tablespoons beetroot powder or red food coloring
- Extra flour for dusting
Equipment Needed
Before you begin, gather the following tools:
- Large mixing bowl
- Dough scraper
- Banneton basket or bowl lined with a towel
- Dutch oven or baking stone
- Sharp knife or bread lame
- Cooling rack
Having the proper equipment makes the process easier and helps achieve professional-quality results.
Step 1: Mix the Dough
Start by combining the warm water and active sourdough starter in a large mixing bowl. Stir thoroughly until the starter is completely dissolved and evenly distributed throughout the water.
Next, add the beetroot powder or red food coloring. Mix well until the liquid develops a consistent ruby-red color. This step is important because it ensures the color is evenly distributed throughout the dough.
Gradually add the bread flour while stirring with a spoon or your hands. Continue mixing until a rough, shaggy dough forms. At this stage, the dough may look uneven and somewhat sticky, which is completely normal.
Cover the bowl and allow the dough to rest for 30 minutes.
This resting period is known as the autolyse stage. During this time, the flour absorbs the water and gluten development begins naturally. The result is a dough that becomes easier to handle and produces a better final texture.
Step 2: Incorporate the Salt
After the autolyse period, sprinkle the salt evenly over the surface of the dough.
Wet your hands slightly and begin folding the dough over itself repeatedly until the salt is fully incorporated.
Initially, the dough may feel sticky and difficult to work with. However, as you continue folding and mixing, it will become smoother and more cohesive.
Salt not only enhances flavor but also strengthens gluten development and helps regulate fermentation.
Step 3: Stretch and Fold
Over the next two hours, perform a series of stretch-and-fold sessions every 30 minutes.
To perform a stretch and fold:
- Grab one side of the dough.
- Stretch it upward gently.
- Fold it over the center.
- Rotate the bowl.
- Repeat on all four sides.
Complete four sets of folds during this period.
These folds are essential for building dough strength without kneading. They help create the open crumb structure that artisan sourdough bread is famous for.
As the dough develops, you’ll notice it becoming smoother, stronger, and easier to handle.
Step 4: Bulk Fermentation
Once the stretch-and-fold process is complete, cover the dough and allow it to ferment at room temperature.
Bulk fermentation usually takes between 4 and 6 hours, depending on the temperature of your kitchen.
During this stage, natural yeast and bacteria from the sourdough starter begin producing gas, causing the dough to rise and develop flavor.
The dough should increase noticeably in volume and appear light and airy. Small bubbles beneath the surface indicate that fermentation is progressing properly.
Patience is key during this stage. Proper fermentation creates the rich flavor and texture that make sourdough bread so unique.
Step 5: Shape the Dough
Lightly flour your work surface and gently transfer the dough from the bowl.
Take care not to deflate the dough too much, as the trapped air contributes to the final loaf’s airy interior.
Shape the dough into a round loaf by folding the edges toward the center and rotating it to create surface tension.
A well-shaped dough helps produce better oven spring and a more attractive finished loaf.
Once shaped, place the dough seam-side up into a floured banneton basket or prepared bowl.
Step 6: Cold Proof Overnight
Cover the basket and place it in the refrigerator for 8 to 12 hours.
Cold proofing offers several advantages:
- Improves flavor development
- Strengthens dough structure
- Makes scoring easier
- Enhances oven spring
- Deepens the vibrant red color
Many artisan bakers consider cold fermentation one of the most important steps in creating exceptional sourdough bread.
Step 7: Preheat the Oven
The following day, place your Dutch oven inside the oven and preheat to 475°F (245°C).
Allow the Dutch oven to heat for at least 30 minutes.
A thoroughly heated Dutch oven creates steam during baking, which is essential for producing a crisp crust and excellent oven spring.
Skipping this step can result in a flatter loaf with a less developed crust.
Step 8: Score the Dough
Carefully remove the dough from the refrigerator and transfer it onto a piece of parchment paper.
Using a bread lame or sharp knife, make a deep slash across the surface.
Scoring serves both functional and decorative purposes. It directs the expansion of the dough during baking and creates the classic artisan appearance that sourdough breads are known for.
Feel free to experiment with creative scoring patterns for an even more impressive presentation.
Step 9: Bake the Bread
Carefully lower the dough into the hot Dutch oven.
Cover with the lid and bake for 25 minutes.
The covered portion of the bake traps steam, allowing the loaf to expand fully before the crust sets.
After 25 minutes, remove the lid and continue baking for another 20 to 25 minutes.
The bread should develop a deep crust and sound hollow when tapped.
For accuracy, the internal temperature should reach approximately 205°F to 210°F (96°C to 99°C).
Step 10: Cool Before Slicing
Transfer the finished loaf to a cooling rack.
Allow it to cool for at least one hour before slicing.
Although it may be tempting to cut into the bread immediately, cooling allows the crumb structure to finish setting. Slicing too soon can result in a gummy texture.
Patience during this final stage rewards you with the best possible texture and flavor.
Serving Suggestions
Ruby Red Artisan Sourdough Bread pairs beautifully with a variety of toppings and meals.
Try serving it with:
- Cream cheese
- Butter and honey
- Avocado toast
- Grilled sandwiches
- Charcuterie boards
- Soups and salads
- Bruschetta toppings
Its vibrant appearance also makes it a stunning centerpiece for holiday tables, celebrations, and special gatherings.
Storage Tips
Store the bread at room temperature in a bread box or paper bag for up to three days.
For longer storage, slice the loaf and freeze the pieces in an airtight container or freezer bag.
Frozen slices can be toasted directly from the freezer, making them convenient for quick breakfasts and snacks.
Final Thoughts
Ruby Red Artisan Sourdough Bread is a perfect example of how traditional baking can be transformed into something truly unique. The vibrant color, rustic crust, and airy interior create a loaf that is as beautiful as it is delicious.
Whether you’re looking to impress guests, create stunning food photography, or simply enjoy a fun baking project, this artisan sourdough recipe is worth adding to your collection. Every slice offers the rich flavor of classic sourdough combined with an unforgettable visual appeal that makes this bread stand out from the crowd.

Leave a Reply