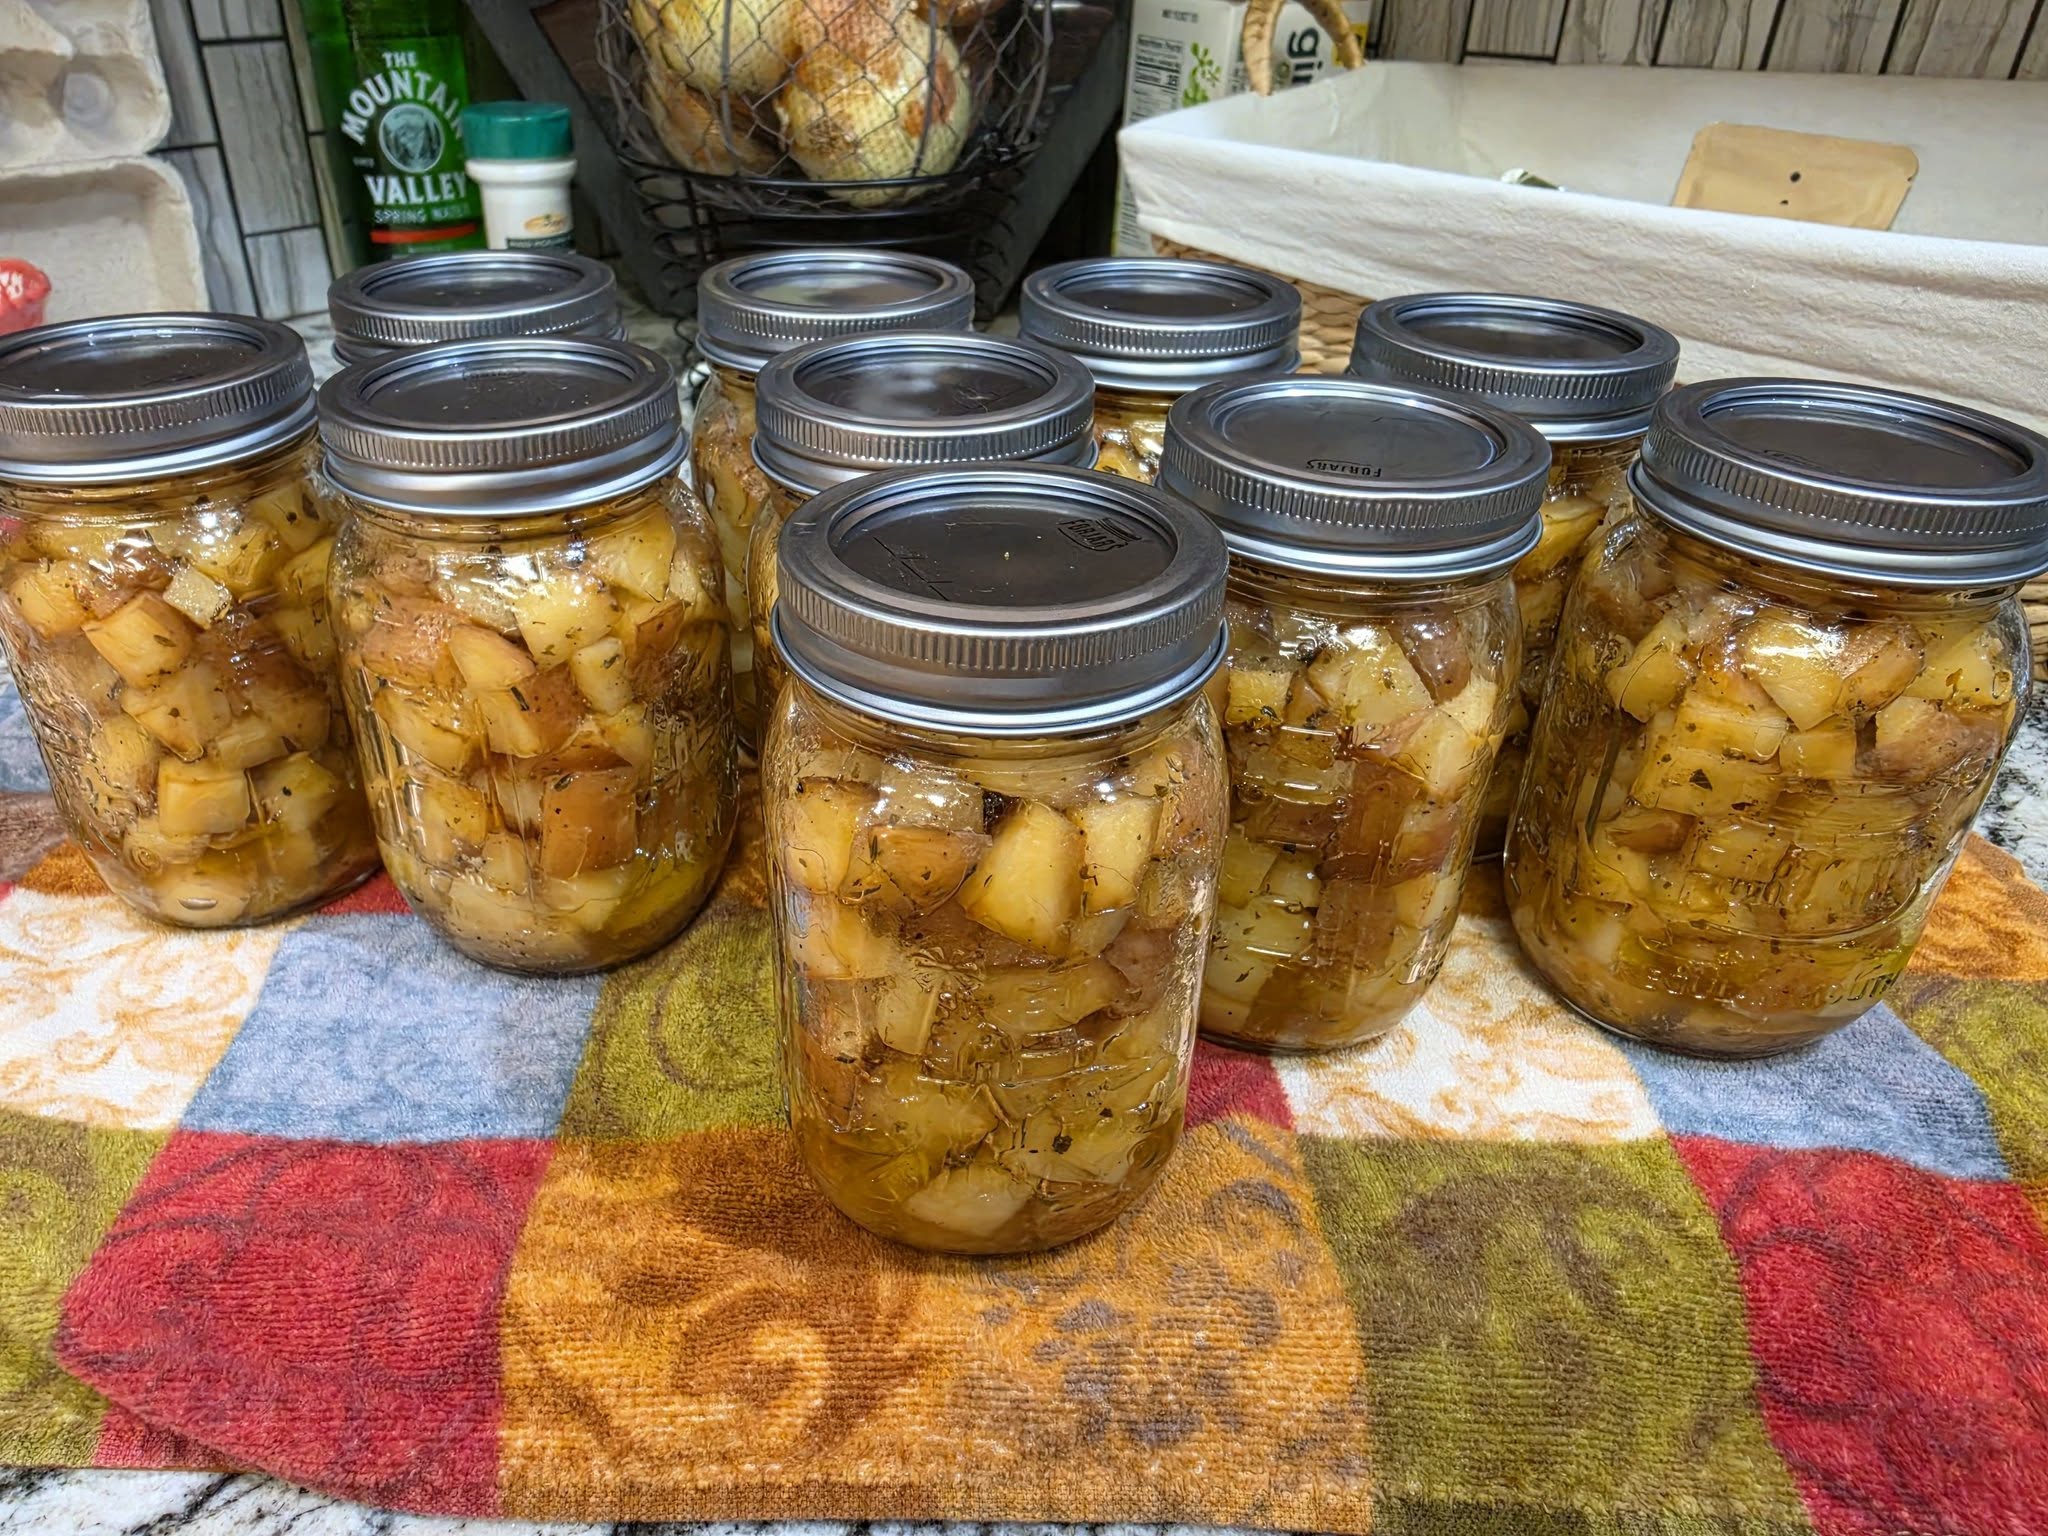
These homemade herbed potatoes are a great way to preserve potatoes for later meals. Tender potato cubes are lightly seasoned with herbs and salt, then packed into jars for convenient storage. Once properly pressure-canned, they can be ready to use whenever you need a quick side dish.
The potatoes in the photo have a beautiful golden color and plenty of herbs throughout, making them look especially delicious when served warm with butter or alongside roasted meat.
Ingredients
- 8–10 pounds mature white potatoes
- 2–3 teaspoons dried thyme
- 2 teaspoons dried rosemary
- 2 teaspoons dried parsley
- 1 teaspoon black pepper
- 1 teaspoon garlic powder
- Salt, as directed below
- Fresh boiling water, as needed
- Ascorbic acid solution, optional, to help prevent discoloration
Choosing the Potatoes
Use firm, mature potatoes without soft spots, green areas, bruises, or signs of spoilage. The National Center for Home Food Preservation recommends peeling potatoes before canning because the tested process was developed using peeled potatoes.
Small to medium potatoes work particularly well. Large potatoes can also be used as long as they’re peeled and cut into evenly sized pieces.
Step 1: Prepare the Potatoes
Wash the potatoes thoroughly and peel them.
Cut them into approximately 1/2-inch cubes. Keeping the pieces relatively uniform helps them cook evenly.
If you’re preparing a large batch, place the cut potatoes into an ascorbic-acid solution according to the product’s directions to help prevent them from darkening.
Step 2: Blanch the Potatoes
Bring a large pot of water to a boil.
Place the cubed potatoes into the boiling water and cook for 2 minutes. Drain them well.
Don’t use the cooking water as the liquid for filling your jars. NCHFP specifically recommends using fresh boiling water because the potato cooking water contains too much starch.
Step 3: Prepare the Jars
Wash and prepare your canning jars, lids, and equipment according to the manufacturer’s instructions.
Keep the jars hot while you prepare the potatoes.
Add 1 teaspoon of salt per quart if desired. For pint jars, use the appropriate proportion.
The herbs in this blog-style recipe are included for flavor, but if you’re preparing potatoes specifically for long-term shelf-stable canning, follow a tested canning recipe exactly rather than changing the ingredient proportions or processing method.
Step 4: Fill the Jars
Pack the hot prepared potatoes into the hot jars.
Don’t crush or tightly mash the potatoes. Leave about 1 inch of headspace at the top of each jar.
Pour fresh boiling water over the potatoes, making sure the potatoes are covered while still maintaining the required 1-inch headspace.
Remove any visible air bubbles with a suitable canning utensil, then wipe the jar rims clean.
Apply the lids and screw bands according to the manufacturer’s directions.
Step 5: Pressure Can the Potatoes
Because potatoes are a low-acid vegetable, they must be processed using a pressure canner for shelf-stable storage. A boiling-water bath should not be substituted.
For the tested NCHFP process:
Pint jars: Process for 35 minutes.
Quart jars: Process for 40 minutes.
The required pressure depends on both your canner type and elevation. For example, with a dial-gauge pressure canner, NCHFP lists 11 PSI from 0–2,000 feet, with pressure increasing at higher elevations. With a weighted-gauge canner, the recommendation is 10 PSI from 0–1,000 feet and 15 PSI above 1,000 feet.
Because pressure and processing requirements are safety-critical, check your elevation and use the pressure specified by the tested NCHFP instructions for your location and canner.
Step 6: Cool the Jars
When the processing time is complete, turn off the heat and allow the pressure canner to cool naturally.
Do not force the pressure down or cool the canner with cold water. NCHFP notes that low-acid foods need the correct processing time and pressure and that the canner should cool until completely depressurized.
Once the pressure has completely returned to zero, carefully open the canner according to the manufacturer’s instructions.
Remove the jars and place them upright on a towel in a draft-free area.
Allow them to cool undisturbed.
How to Serve These Potatoes
Once opened, these potatoes can be turned into a quick and delicious side dish.
Drain the potatoes and pat them dry. Add them to a skillet with butter or olive oil and cook until they’re heated through and lightly browned.
For extra flavor, add fresh parsley, black pepper, garlic, or a little grated Parmesan.
They’re also delicious alongside:
- Roast chicken
- Steak
- Pork chops
- Meatloaf
- Grilled vegetables
- Sausage
- Roasted chicken
- Fried eggs
You can even toss the potatoes into soups, stews, or casseroles when you need a quick shortcut.
Tips for Better Results
Cut evenly: Keeping the potato cubes close to the same size helps them cook consistently.
Don’t overcook before canning: The potatoes only need the brief blanching specified in the tested process.
Use fresh boiling water: Don’t fill the jars with the starchy water used to blanch the potatoes.
Don’t improvise the canning process: Herbs, oils, sauces, or other ingredients can change the characteristics of a tested canning recipe. For shelf-stable storage, stick to the tested process.
Label your jars: Write the contents and date on each jar so you can easily keep track of your batches.
Final Thoughts
Homemade canned potatoes can be incredibly convenient to have on hand. With a little preparation, you can turn a large supply of potatoes into jars that are ready for quick meals later.
These herbed potatoes are especially good when warmed in a skillet with butter and finished with a little fresh parsley. They’re simple, comforting, and perfect for busy weeknight dinners.
Important: The herb-seasoned version shown here is best treated as a flavor variation for cooking, while the actual shelf-stable canning process should follow the tested NCHFP potato recipe exactly. The tested recipe calls for peeled, cubed potatoes, fresh boiling water, 1-inch headspace, and pressure-canning times of 35 minutes for pints and 40 minutes for quarts.

Leave a Reply