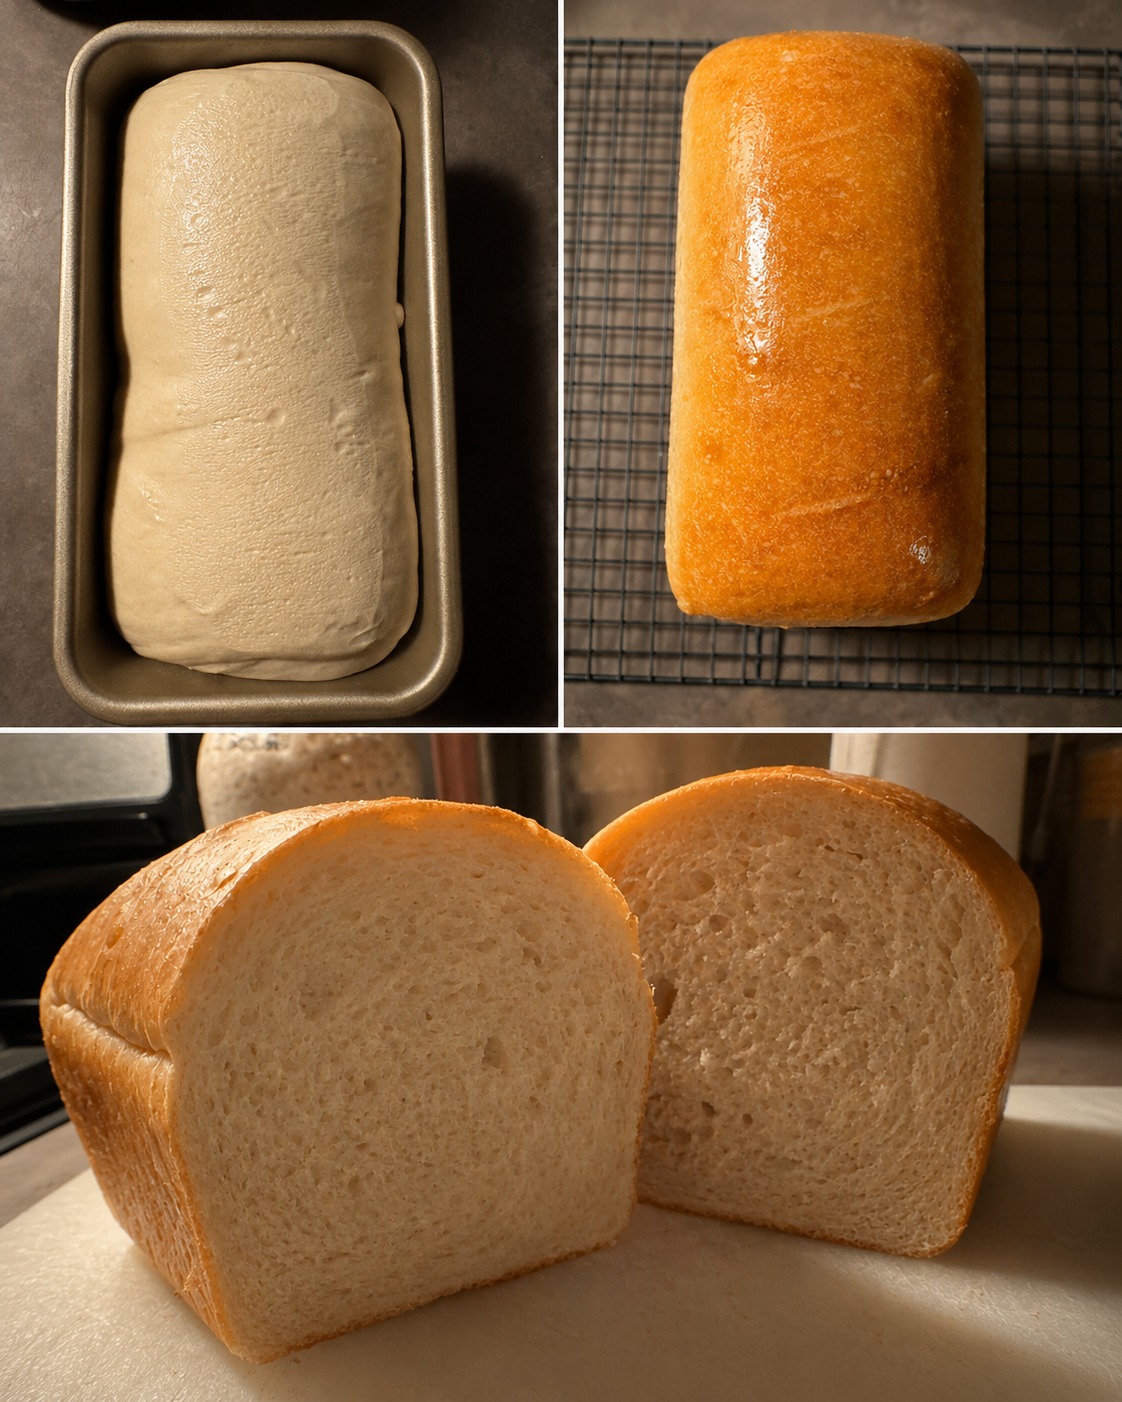
If you love homemade bread with a rich flavor and soft texture, this Sourdough Sandwich Bread recipe is the perfect choice for your kitchen. Unlike traditional crusty sourdough loaves, this sandwich bread is soft, light, and easy to slice, making it ideal for breakfast toast, lunch sandwiches, or even garlic bread. The natural tangy flavor from the sourdough starter gives the bread a delicious depth of taste that store-bought bread simply cannot match.
One of the best things about sourdough sandwich bread is that it combines the health benefits of sourdough fermentation with the softness of classic sandwich bread. Long fermentation helps improve digestion and enhances flavor naturally. Whether you are new to sourdough baking or already experienced, this recipe is simple enough to follow and delivers bakery-style results every time.
This homemade bread has a golden crust, fluffy interior, and incredible aroma straight from the oven. You can enjoy it with butter, jam, eggs, grilled chicken, cheese, or any sandwich filling you like. It also stays fresh for several days, making it a great option for meal prep and family breakfasts.
Why You’ll Love This Recipe
- Soft and fluffy texture
- Perfect for sandwiches and toast
- Naturally fermented for better flavor
- Easy to make with simple ingredients
- Free from preservatives and artificial additives
- Great for beginners and experienced bakers alike
The slow fermentation process creates a deep flavor while keeping the bread light and airy. The addition of butter or coconut oil makes the loaf extra soft and moist, giving it the perfect sandwich bread consistency.
Preparation Details
- Prep Time: 20 minutes
- Cook Time: 45 minutes
- Additional Time: 16 hours
- Total Time: 17 hours 5 minutes
- Servings: 24 servings
- Calories: 200 kcal per serving
Ingredients for Sourdough Sandwich Bread
To make two delicious loaves of sourdough sandwich bread, you will need the following ingredients:
- 1/2 cup softened butter or coconut oil (113 g)
- 2 tablespoons honey or sugar
- 1 tablespoon salt (17 g)
- 1 cup active and bubbly sourdough starter (227 g)
- 2 1/2 cups room temperature water (590 g)
- 8 cups all-purpose flour (1120 g)
These simple pantry ingredients come together to create a soft, flavorful loaf that your whole family will enjoy.
Step-by-Step Instructions
1. Mix the Ingredients
In the bowl of a stand mixer, combine the softened butter, honey, salt, active sourdough starter, and water. Add the flour gradually and mix until a dough begins to form. The flour amount may vary slightly depending on how hydrated your sourdough starter is. The dough should feel soft and slightly tacky but not overly sticky.
2. Knead the Dough
Knead the dough using a stand mixer with a dough hook attachment for about 10 minutes. You can also knead by hand if preferred. The dough should become smooth, stretchy, and elastic. To check if the dough is ready, perform the windowpane test by stretching a small piece of dough gently. If it stretches thin without tearing, the dough is properly kneaded.
3. Bulk Fermentation
Place the dough into a lightly greased bowl and cover it with a damp towel or plastic wrap. Allow it to rise in a warm place for 10–12 hours or overnight. During this time, the sourdough starter ferments the dough, creating flavor and improving texture.
The dough should roughly double in size by the end of the bulk rise. Warmer kitchens may require less time, while cooler environments may take longer.
4. Shape the Loaves
After fermentation, transfer the dough onto a lightly floured surface. Divide it evenly into two portions. Using a rolling pin, gently flatten each piece into a rectangle. Roll the dough tightly into a loaf shape and place each loaf into a greased or parchment-lined loaf pan.
Proper shaping helps create a beautiful sandwich loaf with an even crumb structure.
5. Second Rise
Cover the loaf pans and let the dough rise again at room temperature for 2–4 hours. The dough should rise until it doubles in size and crowns slightly above the edge of the loaf pan.
This second rise is important because it gives the bread its soft and airy texture.
6. Bake the Bread
Preheat your oven to 375°F (190°C). For a shiny golden crust, you can brush the tops of the loaves with an egg wash before baking.
Bake the loaves for approximately 45 minutes or until the tops are golden brown. The bread should sound hollow when tapped on the bottom.
If the crust browns too quickly, loosely cover the loaves with aluminum foil during the final part of baking.
7. Cool Before Slicing
Remove the bread from the oven and let it cool in the pans for a few minutes before transferring to a wire rack. Allow the loaves to cool completely before slicing. This helps maintain the bread’s texture and prevents it from becoming gummy.
Tips for the Best Sourdough Sandwich Bread
- Use an active and bubbly sourdough starter for the best rise.
- Avoid adding too much flour, as it can make the bread dense.
- Let the bread cool completely before cutting.
- Store in an airtight container to keep it soft longer.
- Add seeds, oats, or herbs for extra flavor and texture.
Serving Ideas
This sourdough sandwich bread is extremely versatile and can be enjoyed in many ways:
- Toasted with butter and jam
- Peanut butter sandwiches
- Grilled cheese sandwiches
- Chicken or turkey sandwiches
- French toast
- Garlic bread
- Avocado toast
Its soft texture makes it ideal for school lunches, breakfast meals, or quick snacks.
Nutrition Facts
Per serving:
- Calories: 200 kcal
- Carbohydrates: 35 g
- Protein: 5 g
- Fat: 4 g
- Sodium: 323 mg
Final Thoughts
Homemade Sourdough Sandwich Bread is one of the most satisfying breads you can bake at home. The long fermentation process develops incredible flavor while creating a soft and fluffy texture perfect for sandwiches and toast. Once you try this recipe, it may become your go-to homemade bread recipe for everyday baking.
Whether you are serving it fresh from the oven, making sandwiches for your family, or enjoying a warm slice with butter, this sourdough sandwich bread delivers comfort and delicious flavor in every bite.

Leave a Reply